 how-to
Flickering Lights in Old House: Causes & Fixes
Table of Contents
- Why Flickering Lights Happen in Older Homes
- Loose Neutral Wire Symptoms and What They Mean
- Flickering Lights on One Circuit: Diagnosis and Fixes
- Common Culprits: Loose Connections, Faulty Bulbs, and Overloaded Circuits
- Aging Wiring, Knob-and-Tube Systems, and Grounding Issues
- Electrical Safety Inspection Checklist for Your Home
- When to Call a Licensed Electrician
- Frequently Asked Questions
Last Updated: September 30, 2026
Why Flickering Lights Happen in Older Homes
Flickering lights in old house wiring often signal deeper electrical issues that demand attention. Older homes built before modern electrical codes were established frequently have outdated systems that struggle to handle today's electrical demands, but the causes are usually preventable.
The problem typically stems from loose connections, aging wiring, or overloaded circuits. Flickering happens when electrical current faces resistance in the circuit path, creating voltage drops that cause lights to dim and brighten unpredictably.
Understanding the root cause matters because some causes pose genuine safety risks. A loose neutral wire connection can generate heat inside your electrical panel and create fire hazards, while others like incompatible LED bulbs are merely annoying.
Loose Neutral Wire Symptoms and What They Mean
A loose neutral wire connection is one of the most serious causes of flickering lights in old houses. When this connection loosens, current seeks alternative paths, causing erratic voltage throughout your home.
Signs of a loose neutral wire include:
- Lights flicker randomly across multiple circuits
- Appliances behave erratically (refrigerator cycles on and off, TV picture dims)
- Burning smell near the electrical panel or outlets
- Buzzing or humming sounds from fixtures or the panel
- Voltage fluctuations measured with a multimeter
A loose neutral wire at the main service panel is particularly dangerous, as the loose connection generates heat that can melt insulation around other wires and create short circuit conditions.
This is not a DIY fix. If you suspect a loose neutral wire, contact a licensed electrician immediately. The problem requires accessing your electrical panel, which carries serious shock risk.
Flickering Lights on One Circuit: Diagnosis and Fixes
When only one circuit flickers, the issue typically lives within that circuit rather than at the main panel or utility service.
Start with these diagnostic steps:
- Note which outlets and fixtures flicker together
- Check if the flickering happens when specific appliances run
- Look for any visible damage to wiring, outlets, or fixtures in that circuit
- Test the circuit breaker to ensure it's seated firmly in the panel
A single flickering circuit usually points to a loose connection at an outlet, switch, or fixture.
Common Culprits: Loose Connections, Faulty Bulbs, and Overloaded Circuits
Loose Electrical Connections and Wire Nuts
Loose connections are the most common cause of flickering lights in old houses. Older wiring relies heavily on wire nuts, threaded plastic caps that twist onto bare wire ends to join them together.
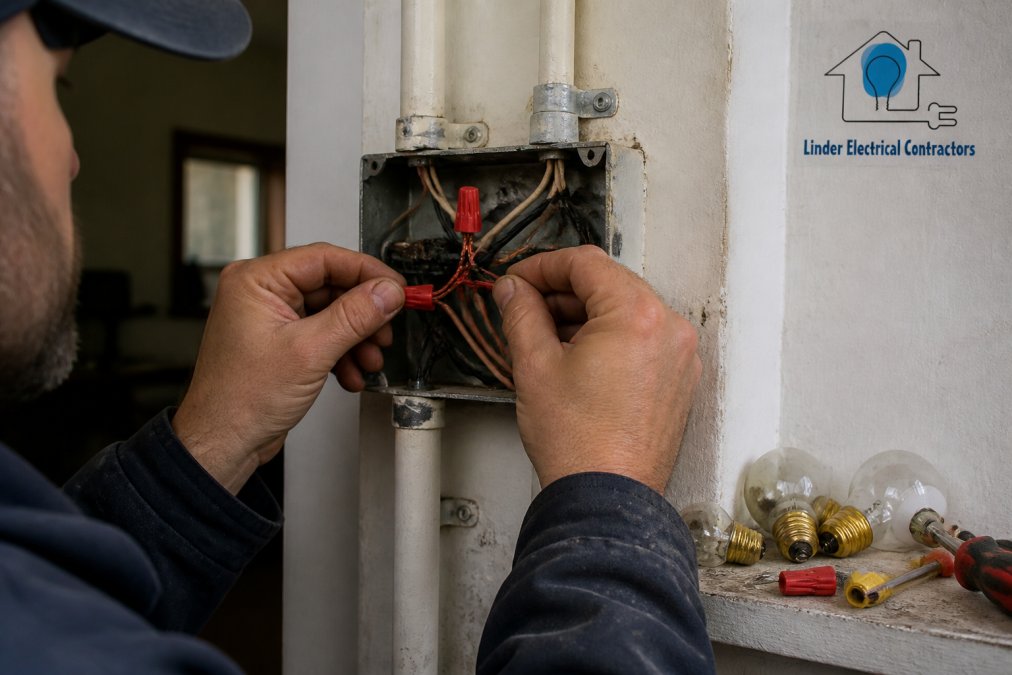
Check wire connections at:
- Light fixture terminals where wires connect to the socket
- Outlet and switch terminals where wires attach
- Junction boxes hidden behind walls (requires panel access)
- Terminal screws on older fixtures and outlets
LED vs. Incandescent Bulbs and Dimmer Compatibility
Many homeowners install LED bulbs expecting them to work like incandescent bulbs, but older dimmer switches use technology designed for incandescent loads. When you install an LED bulb in a circuit with an older dimmer, the dimmer may send incompatible signals that cause the LED to flicker.
Solutions include:
- Replace the dimmer with an LED-compatible model
- Use incandescent or halogen bulbs on that circuit
- Install LED bulbs only on non-dimmed circuits
- Choose LED bulbs specifically rated for your dimmer model
Smart Home Switches and Modern Dimmer Incompatibility
A growing cause of flickering in older homes involves smart switches and smart dimmers installed on legacy wiring. This issue rarely appears in troubleshooting guides but is increasingly common as homeowners upgrade to smart home technology.
Diagnostic steps:
- Note if flickering started after installing a smart switch or smart dimmer
- Check the switch manufacturer's specifications for minimum load requirements (often printed on the switch or in the manual)
- Count the total wattage of all bulbs on that circuit (multiply the wattage per bulb by the number of bulbs)
- If total wattage is below the switch's minimum, this is likely your cause
Solutions:
- Replace the smart switch with a standard switch (smart switches are not necessary for every circuit)
- Install a load resistor or dummy load device designed for smart switches (these add artificial load to meet the switch's minimum requirement)
- Upgrade to smart switches specifically designed for low-load applications (some manufacturers now offer models rated for loads as low as 5 watts)
- Combine multiple circuits into one (requires a licensed electrician to rewire)
Overloaded Circuits and Voltage Drop
Older homes often have fewer circuits than modern codes require. When you plug too many devices into one circuit, the total current demand exceeds capacity, creating voltage drop that decreases the voltage available to your lights.
Signs of an overloaded circuit:
- Lights dim when you turn on a major appliance
- Flickering increases when the refrigerator compressor cycles on
- Outlets feel warm to the touch
- The circuit breaker trips frequently
Aging Wiring, Knob-and-Tube Systems, and Grounding Issues
Homes built before the 1950s often contain knob-and-tube wiring, individual wires suspended on ceramic insulators and threaded through ceramic tubes. This wiring type creates specific flickering patterns distinct from other causes.
How Knob-and-Tube Wiring Causes Flickering
Uncontrolled return paths: In knob-and-tube systems, if the neutral connection loosens or corrodes, return current seeks alternative paths through building structure, water pipes, or metal framing, creating unpredictable voltage drops at light fixtures.
Diagnostic Signs of Knob-and-Tube Problems
If your home was built before 1950, look for these indicators:
- Visible ceramic knobs and tubes in attic spaces, basements, or crawl spaces (this confirms knob-and-tube wiring is present)
- Two-prong outlets throughout the home (indicates no ground wire; three-prong outlets may have been added but original circuits remain ungrounded)
- Flickering that worsens during humid weather (moisture accelerates corrosion and insulation breakdown)
- Flickering concentrated in older portions of the home (additions with modern wiring may work fine while original circuits flicker)
- Burning or acrid smell in walls or attic (indicates insulation failure and arcing)
- Discolored or blackened ceramic knobs (sign of heat damage from arcing)
Other Aging Wiring Problems
Cloth-wrapped wiring (1920s-1960s): Insulation deteriorates, exposing bare copper and causing arcing similar to knob-and-tube systems. Undersized wire gauges: Older homes often have 12-gauge or 14-gauge wire on circuits now carrying modern loads, creating voltage drop when multiple devices run simultaneously. Corroded service entrance connections: The main connection where utility lines meet your home's wiring can corrode, causing voltage fluctuations throughout the entire house.
Insurance and Code Implications
Knob-and-tube wiring affects insurability and resale value, many insurance policies exclude coverage or charge higher premiums, and mortgage lenders often require replacement before closing. If flickering coincides with knob-and-tube wiring discovery, contact a licensed electrician for a full system evaluation and written estimate.
When Rewiring Is Necessary
A complete rewiring project replaces all old wiring with modern, grounded wire and involves running new wire from the electrical panel to all outlets, switches, and fixtures; upgrading the main service panel if needed; obtaining permits; and passing local inspection. Cost typically ranges from several thousand to tens of thousands of dollars, but rewiring is essential for safety, code compliance, and insurability.
Electrical Safety Inspection Checklist for Your Home
Regular inspection catches problems before they become dangerous. Use this checklist to evaluate your electrical system:
- Inspect all visible wiring for cracks, hardening, or discoloration
- Check that outlet and switch covers are secure and undamaged
- Test GFCI outlets in bathrooms and kitchens (push the test button; outlet should cut power)
- Verify all outlets have three holes (indicating ground wire presence)
- Look for burn marks, discoloration, or scorch marks around outlets or fixtures
- Smell for burning or acrid odors near electrical components
- Check that all wire connections at outlets are tight (after turning off power)
- Confirm circuit breaker labels match actual circuits
- Test that breakers trip when overloaded (use a hair dryer or space heater)
- Inspect the main electrical panel for signs of corrosion or heat damage
- Verify that the panel has a main disconnect breaker
- Check that all exposed wiring is properly insulated and supported
When to Call a Licensed Electrician
Some flickering light problems are safe for homeowners to investigate. Others require professional expertise and equipment. Know the difference.
Call a licensed electrician immediately if you notice:
- Burning smell near outlets, fixtures, or the electrical panel
- Sparks or arcing at outlets or fixtures
- Flickering that worsens over time or spreads to new circuits
- Warm or hot outlets or switch plates
- Buzzing or humming sounds from the panel or wiring
- Signs of knob-and-tube or cloth-wrapped wiring
- Frequent circuit breaker trips
- Flickering accompanied by power loss to entire rooms
Frequently Asked Questions
Can a circuit breaker issue cause flickering lights in an old house?
Yes. A faulty circuit breaker or one that is tripping intermittently can cause lights to flicker or cut out. If you notice flickering tied to a specific circuit breaker, or if the breaker feels warm to the touch, contact a licensed electrician. A breaker that is not holding load properly may indicate a short circuit, arcing, or an overloaded circuit that poses a fire hazard.
What are loose neutral wire symptoms I should watch for?
A loose neutral wire at the main service panel or within branch circuits causes voltage fluctuations that make lights flicker or dim unpredictably. You may also notice lights brighten and dim in sync, burning out bulbs faster than normal, or a burning smell near outlets. This is a serious safety issue, a loose neutral connection can cause arcing and electrical fire. Have a licensed electrician inspect your electrical panel and fixture wiring immediately.
Is it safe to leave flickering lights on in an older home?
No. Flickering lights often signal loose connections, arcing, or voltage issues, all fire hazards. Intermittent flashing may indicate a short circuit or failing fixture wiring. While a single flickering LED bulb is usually harmless, flickering across multiple lights or circuits suggests a dangerous electrical problem. Turn off the affected circuit and call a professional for inspection before extended use.
How do I know if flickering lights mean I need a full electrical panel upgrade?
Not all flickering requires a panel replacement. Start with a professional electrical troubleshooting: check for loose connections, test voltage drop, and inspect wiring insulation. Aging wiring or knob-and-tube systems, overloaded circuits, or utility company issues may need repair without replacing the panel. However, if your home has outdated main service panel capacity, failing branch circuits, or grounding issues, an upgrade may be necessary for safety and code compliance.